Whenever something bad happens with your garage door, it influences your house’s visual attractiveness and security, so you should never put off repairs. The machinery is heavily used, and ultimately, things break down. Perhaps a spring or motor has broken, or a sensor has failed, and your door will not open.
The door might be physically damaged. Garage doors may be damaged in a variety of ways, from being hit by a car to being hit by a lawnmower or a bicycle. Tree branches, as well as wayward basketballs, can damage them. When loading a vehicle with long goods, some people inadvertently close the door on an object higher than the sensors can detect. Temperature changes can also cause warping of panels.
When physical damage occurs, you do not necessarily need to replace the entire garage door, regardless of how it happened. Instead, garage door panel repair may be the best solution, and you may be able to do it for yourself if you’re capable. Here’s a step-by-step guide to understanding how your garage door works and how to replace a panel.
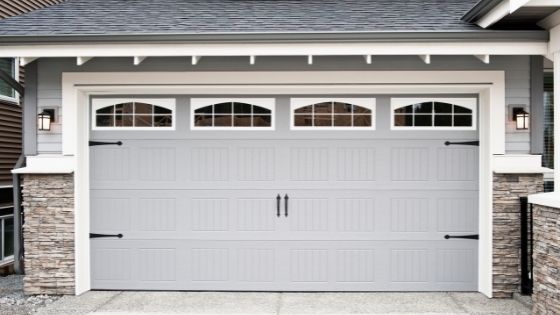
Garage Door Panels
Every garage door contains at least four panels and may have as many as six or more. These panels span the length of the doorway horizontally and are joined by hinges that enable them to curve around the corner at the garage roof. They sit on a track that holds them in place.
The pulley system that raises and lowers the door is attached to the top panel. The following panel is attached to the base of this panel as well as the panel underneath it until you reach the final panel.
The final panel will have a rubberized bottom added to it to keep the rain out. Because of its low location, the bottom panel is most vulnerable to damage when it closes on objects or is slammed against by things.
1. Measure The Door Panel
You must take measurements of the panel from one end to the other. Never estimate the width of a garage door. Measurements are usually taken in whole numbers. You’ll also need to choose the height of your screen. The standard sizes are 18, 21, and 24 inches; however, you may have a custom door. Finally, you must determine the thickness of your panel. The most popular ones are 1-3/8 inch and 2 inches.
2. Look For The Brand Name
The majority of manufacturers place a sticker at one end of the bottom or top panel where the rollers contact the track. Your sticker should specify the brand name, panel style, colour, serial number, and dimensions. It should also provide a phone number or website where customers can buy components or services.
If you can’t find this information, you’ll have to track down the person who installed the doors. If you do not really know who placed the doors, it’s time to contact a garage door replacement panel service.
3. Remove The Panel
After you’ve acquired the garage door repair panel, you should start by disconnecting your garage door opener for security. A hoist will be required to attach to the head of the garage door track at one side. The hoist’s other end is linked to the hinge above the broken panel. Next, locate the cables connecting the brackets between the panels and fasten them to the drums with a vice grip. Typically, each door has two wires.
When you separate the panels, lift the garage door about 4 inches using the hoist and use a 24, rock, or something strong to hold the door’s weight. Unfasten the hinge bolts that are connecting the fractured panel to the panel above. Begin on the outside and work your way to the centre. Remove the destroyed panel and set it aside if you’re changing the bottom panel.
If you are changing a middle panel, you must first remove the hinge nuts that connect the broken panel to the panel below it. After you’ve loosened these bolts, you’ll need to use the hoist to pull the upper portion away from the damaged panel before you can pull it free and set it aside.
4. Set Up The New Panel
Put the fresh panel in the tracks, then lower it onto the panel underneath it. To keep the panel in place while re-attaching the hinge bolts to the panel below, use vice grips to clamp it to the tracks on each side. Using the hoist, lower the upper portion of the doorway onto the replacement panel, and then re-attach the hinges bolts.
5. Test The Door
When you’re finished, remove the vice grips, connect your garage door opener, and lift the door. Slowly inspect your hinges to ensure that they bend smoothly and that the panels are level with one other. You’re done if everything goes smoothly. Congrats, you’ve changed your garage door panel!


